
Welcome to the Dynex Television Manual, your comprehensive guide to navigating features, troubleshooting, and optimizing your viewing experience with ease and efficiency;
Brief History of Dynex Televisions
Dynex, a brand owned by Best Buy, emerged in 2003 as a budget-friendly alternative for electronics. Initially focusing on accessories, Dynex expanded into televisions, offering affordable options without compromising quality. Over the years, Dynex TVs gained popularity for their reliability and value, catering to a wide range of consumers. The brand introduced various models, from basic LED TVs to smart TVs with modern features, ensuring accessibility for all. Dynex’s commitment to innovation and affordability has solidified its place in the competitive television market, providing cost-effective solutions for everyday entertainment needs.

Key Features of Dynex Televisions
Dynex televisions offer LED screens, smart TV capabilities with Wi-Fi connectivity, and multiple HDMI ports, ensuring an enhanced viewing experience with modern technology and user-friendly interfaces at affordable prices.
Display Technology and Resolution Options
Dynex televisions feature cutting-edge display technologies, including LED and LCD panels, designed to deliver crisp and vibrant visuals. With options ranging from HD to Full HD resolutions, these TVs offer sharp imagery and detailed color reproduction. The high contrast ratio ensures deeper blacks and brighter whites, enhancing the overall viewing experience. Additionally, Dynex televisions support a wide range of motion rates, making them ideal for fast-paced content like sports and action movies. For optimal picture quality, users can adjust settings such as brightness, contrast, and color balance directly through the on-screen menu. Whether you’re watching your favorite shows or gaming, Dynex’s display technology provides a seamless and immersive experience tailored to your preferences.
Sound Systems and Audio Capabilities
Dynex televisions are equipped with advanced sound systems designed to enhance your entertainment experience. Many models feature built-in stereo speakers that deliver clear and balanced audio, while others support Dolby Audio technology for immersive sound quality. Users can customize audio settings, such as equalizer adjustments and surround sound modes, directly through the TV’s menu. Additionally, Dynex TVs often include multiple HDMI ports and Bluetooth connectivity, allowing seamless integration with external soundbars, home theaters, or wireless speakers. This flexibility ensures that you can tailor the audio output to your preferences, whether you’re watching movies, gaming, or enjoying music. The combination of high-quality speakers and versatile connectivity options makes Dynex televisions a great choice for both casual viewers and audiophiles alike.
Smart TV Features and Connectivity
Dynex televisions offer a range of smart TV features that enhance your viewing experience. With built-in Wi-Fi connectivity, users can easily access popular streaming platforms like Netflix, Hulu, and Amazon Prime Video directly through the TV’s interface. The smart TV platform provides a user-friendly menu for navigating apps, managing content, and personalizing settings. Many models also support voice control via compatible devices, allowing for hands-free navigation. Connectivity options include multiple HDMI ports for linking external devices, such as gaming consoles or soundbars, and USB ports for playing media from external drives. Bluetooth compatibility is available on select models, enabling wireless connections to speakers or headphones. These features ensure seamless integration with modern entertainment systems, making Dynex TVs a versatile and convenient choice for smart home setups.
Installation and Setup Guide
This section provides a detailed, easy-to-follow guide for setting up your Dynex TV, including unpacking, placement, and connecting devices for a seamless installation experience.
Step-by-Step Installation Process
Begin by carefully unpacking your Dynex television and placing it on a sturdy, flat surface. Connect the power cord to a nearby outlet and plug in any external devices, such as cable boxes or gaming consoles, using HDMI cables. Turn on the TV and navigate through the on-screen setup menu to select your preferred language, display settings, and Wi-Fi network. Follow the prompts to complete the initial configuration, ensuring all connections are secure. Once setup is complete, test the TV by switching between inputs and verifying audio and video functionality. Refer to the user manual for additional guidance if needed, ensuring a smooth and hassle-free installation experience.
Connecting to Wi-Fi and Other Devices
To connect your Dynex television to Wi-Fi, navigate to the network settings menu and select your desired network from the available options. Enter the password when prompted to establish a secure connection. For external devices, use HDMI ports to link devices like Blu-ray players or gaming consoles. Ensure cables are firmly connected to both the TV and the device. Additionally, USB ports can be used for media playback from flash drives. Bluetooth connectivity may also be available for wireless audio devices. If issues arise, restart your TV and devices, then retry the connection. Verify your Wi-Fi signal strength and ensure all passwords are correctly entered for a seamless setup experience.

Troubleshooting Common Issues
Troubleshooting common issues with your Dynex TV? This guide helps resolve problems efficiently, ensuring optimal performance and uninterrupted entertainment. Follow the steps to diagnose and fix issues swiftly.
Resolving Connectivity Problems
Experiencing connectivity issues with your Dynex TV? Start by ensuring your Wi-Fi network is stable and that the TV is connected to the correct network. Restart your router and TV to refresh the connection. If problems persist, check your network settings and verify your Wi-Fi password. For wired connections, ensure the Ethernet cable is securely plugged into both the TV and router. If connectivity issues remain, reset your TV’s network settings or perform a factory reset. Additionally, ensure your TV’s software is up to date, as outdated firmware can cause connectivity problems. Consult the user manual for detailed troubleshooting steps and error code solutions to restore your TV’s internet connection efficiently.
Addressing Picture and Sound Issues
If you’re experiencing issues with your Dynex TV’s picture or sound, start by checking the input source and ensuring all cables are securely connected. Restarting the TV can often resolve temporary glitches. For picture issues, adjust brightness, contrast, and color settings to optimize your viewing experience. If the screen appears blurry or pixelated, check the resolution settings to ensure they match your content source. For sound problems, verify that the volume is not muted or too low and ensure the correct audio mode is selected. If issues persist, update your TV’s software to the latest version, as outdated firmware may cause audio-visual discrepancies. Refer to the manual for detailed troubleshooting steps to restore clear visuals and crisp sound.
Maintenance and Care Tips
Regularly clean the screen with a soft cloth and avoid harsh chemicals. Store the TV in a dry, cool place, and use a protective cover when not in use.
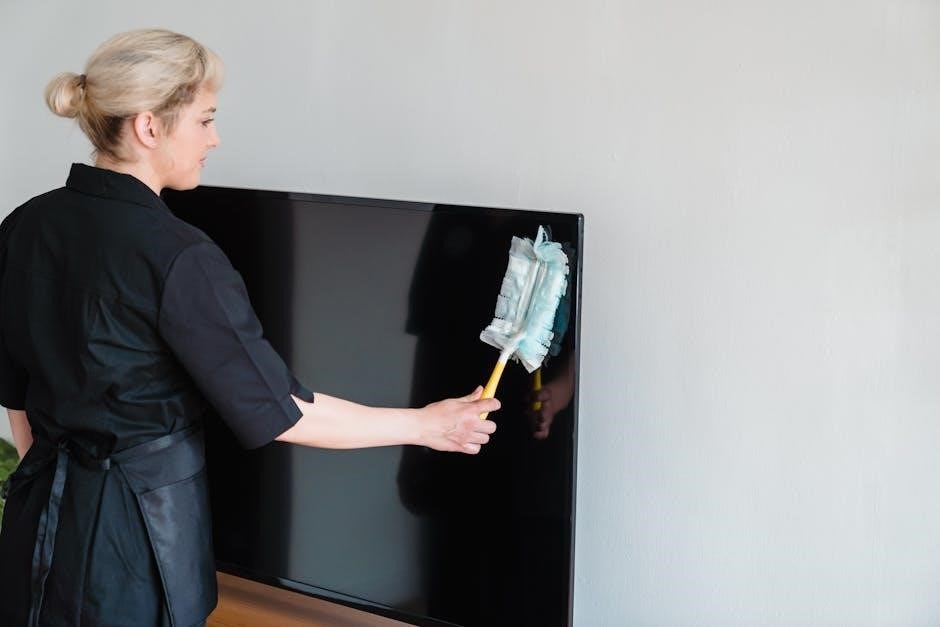
Cleaning the Screen and Exterior
To maintain your Dynex television’s optimal performance and appearance, regular cleaning is essential. Start by turning off the TV and unplugging it for safety. Use a soft, dry microfiber cloth to gently wipe the screen, removing dust and fingerprints. Avoid using harsh chemicals, abrasive cleaners, or wet cloths, as they may damage the screen’s coating or cause streaks.
For the exterior, a slightly damp cloth can be used on plastic and metal parts, but ensure it is not soaking wet. Avoid alcohol-based or ammonia-based products, as they may harm the finish. Regular cleaning prevents dust buildup and ensures the TV operates efficiently while maintaining its aesthetic appeal.

Updating Software for Optimal Performance
Regular software updates are crucial for ensuring your Dynex television operates at its best. These updates often include performance improvements, new features, and bug fixes. To update your TV, navigate to the settings menu and select the “Support” or “System Update” option. Choose “Check for Updates” and follow the on-screen instructions to download and install the latest version. Ensure your TV is connected to Wi-Fi for a smooth update process. Avoid turning off the TV or disconnecting it during the update, as this could cause issues. If you encounter problems, refer to the Dynex user manual or contact customer support for assistance. Keeping your software up to date ensures a seamless viewing experience and access to the latest features.