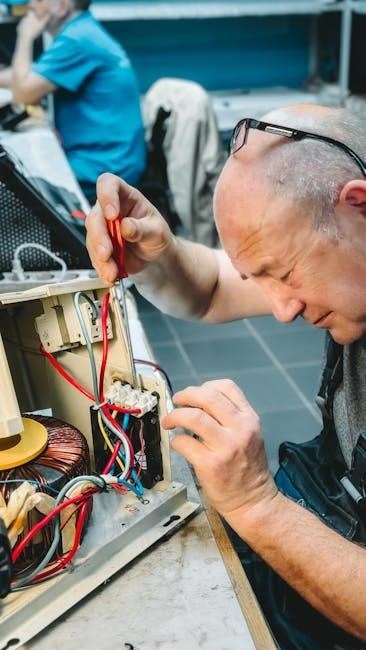
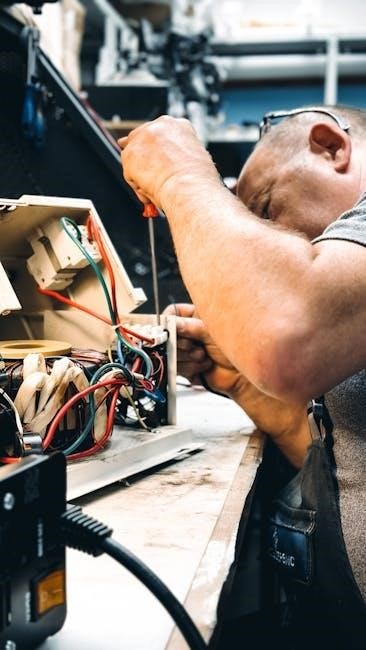
A wiring diagram is a visual guide essential for understanding and installing electrical systems in 110cc engines, ensuring proper connections and troubleshooting for safety and optimal performance.
1.1 What is a Wiring Diagram?
A wiring diagram is a detailed schematic representation of an electrical system, showcasing components, connections, and wire colors. It provides a clear visual guide for installing, troubleshooting, and understanding the electrical setup of a 110cc engine, ensuring proper functionality and safety. This diagram is essential for DIY repairs and maintenance, offering step-by-step instructions for enthusiasts and mechanics alike.
1.2 Importance of Wiring Diagrams for 110cc Engines
A wiring diagram is crucial for understanding and working with the electrical system of a 110cc engine. It simplifies complex connections, ensuring components like the ignition, starter, and battery are correctly linked. This guide is essential for troubleshooting, repairs, and maintenance, enhancing safety and performance. It serves as a vital tool for both novice enthusiasts and experienced mechanics, providing clarity and precision.

Essential Components of a 110cc Wiring Diagram
The diagram includes key components like the ignition switch, starter relay, battery, spark plug, CDI box, and sensors, ensuring proper electrical connections and system functionality.
2.1 Ignition Switch
The ignition switch is a critical component in the wiring diagram, controlling the power supply to the engine. It connects to the battery and other essential parts, ensuring the engine starts and runs smoothly. The switch typically has multiple positions, such as off, on, and start, which regulate electrical flow. Proper wiring of the ignition switch is vital for safe and efficient engine system operation.
2.2 Starter Relay
The starter relay is a key component that connects the ignition switch to the starter motor. It helps manage high current flows, protecting the ignition switch from excessive heat. Proper installation and wiring are essential to ensure reliable engine starts and prevent electrical issues.
2.3 Battery and Voltage Regulator
The battery powers the electrical system, while the voltage regulator ensures stable voltage supply to components. Proper wiring connects the battery to the ignition switch and starter motor, with the regulator linked to the alternator. Correct installation prevents electrical failures and ensures efficient charging, safeguarding the system from voltage fluctuations and maintaining optimal engine performance. Always follow the diagram for precise connections.
2.4 Spark Plug and CDI Box
The spark plug ignites the fuel mixture, while the CDI box generates the high voltage needed for ignition. Proper wiring connects the CDI box to the spark plug, ensuring timely sparks. Color-coded wires in the diagram indicate connections, and testing spark strength is crucial for diagnosing issues. Always follow the wiring diagram to ensure correct installation and reliable engine operation. Consult the manual for specific CDI configurations.
2.5 Sensors and Electrical Connections
Sensors monitor engine conditions, such as speed and temperature, ensuring optimal performance. Electrical connections link these sensors to the CDI box or ECU, providing critical data. Proper wiring ensures accurate signal transmission, while incorrect connections can lead to system malfunctions. Always follow the wiring diagram to connect sensors correctly, referencing manufacturer instructions for specific configurations and troubleshooting guidance. This ensures reliable engine operation and safety.

Tools and Materials Needed for Wiring
Essential tools include a multimeter, wire strippers, connectors, and a soldering iron. Materials needed are a wiring harness, electrical tape, and a repair manual for reference.
3.1 Multimeter for Testing Connections
A digital multimeter is crucial for diagnosing electrical issues in a 110cc wiring system. It measures voltage, current, and resistance, helping identify faulty connections, short circuits, or open wires. Use it to test continuity between components, ensuring proper electrical flow. This tool is indispensable for verifying the integrity of wires and connections before and after installation. Always refer to the multimeter’s manual for accurate readings and safe operation.
3.2 Wire Strippers and Connectors
Wire strippers are essential for safely removing insulation from wires, ensuring clean connections. Connectors secure wires to components, maintaining reliable electrical flow. Proper stripping and connection prevent short circuits and electrical failures. Use high-quality connectors to avoid corrosion and ensure durability. Always match connector types to specific wires for optimal performance and safety in your 110cc wiring system.
3.4 Safety Gear and Manuals
Safety gear, such as gloves and goggles, protects against electrical hazards and physical harm. Manuals provide detailed instructions, ensuring compliance with manufacturer guidelines. Always consult official manuals for specific safety protocols and wiring instructions. Proper adherence prevents errors and ensures the system operates safely and efficiently, aligning with industry standards for 110cc engine wiring projects.
Step-by-Step Installation Guide
Follow the wiring diagram to prepare and connect components systematically. Test each connection with a multimeter to ensure proper electrical flow and safety before powering up the engine.
4.1 Preparing the Wiring Harness
To prepare the wiring harness, inspect all wires for damage or frays. Use wire strippers to expose conductive ends and connectors for secure attachments. Ensure proper color-coding alignment as per the diagram. Organize wires neatly to prevent tangles and interference. Apply heat-shrink tubing or electrical tape for added protection. Disconnect the battery before starting work to avoid electrical shocks or short circuits. Always refer to the manufacturer’s manual for specific instructions.
4.2 Connecting the Ignition Switch
Locate the ignition switch and identify its terminals using the wiring diagram. Connect the positive battery wire to the switch’s input terminal. Attach the output wire from the switch to the starter relay, ensuring secure connections. Use proper wire connectors to prevent corrosion. Disconnect the battery before starting work to avoid electrical shocks. Once connected, test the ignition by turning the key to ensure it activates the starter motor properly. Always follow the manufacturer’s instructions for specific wiring configurations.

4.3 Installing the Starter Relay
Mount the starter relay in an accessible location, ensuring it is secure and away from heat sources. Connect the positive battery terminal to the relay’s input terminal. Link the ignition switch’s output wire to the relay’s trigger terminal. Attach the starter motor wire to the relay’s output terminal. Use appropriate connectors for a snug fit. Disconnect the battery before wiring to prevent electrical shocks. Test the relay by turning the ignition key to ensure the starter motor activates smoothly. Follow the wiring diagram for specific terminal configurations and verify all connections are tight and insulated properly;

4.4 Wiring the CDI Box
Locate the CDI box and secure it in a protected area. Connect the spark plug wire to the designated output terminal. Link the ignition coil to the CDI box using the appropriate wires. Ensure the CDI box is connected to the ignition switch and battery via the wiring harness. Follow the diagram for correct terminal connections. Test the system to confirm proper spark generation. Always refer to the manufacturer’s instructions for specific wiring configurations and safety precautions to avoid damage or malfunction.
4.5 Connecting the Battery and Voltage Regulator
Secure the battery in a well-ventilated area and connect the positive terminal to the ignition switch. Attach the negative terminal to the engine chassis for grounding. Link the voltage regulator to the battery using the correct gauge wires. Ensure the regulator is properly connected to the wiring harness. Follow the diagram to confirm terminal polarity. Test the system with a multimeter to ensure stable voltage output. Always refer to the manufacturer’s guidelines for specific wiring configurations and safety protocols.

Troubleshooting Common Wiring Issues
Identify faulty connections, test spark plugs, and diagnose the CDI box; Use a multimeter to check voltage and continuity. Refer to the wiring diagram for clarity and solutions.
5.1 Identifying Faulty Connections
Inspect the wiring harness for damaged or frayed wires, which can cause shorts or open circuits. Use a multimeter to test continuity and voltage. Check for loose connections and corrosion. Refer to the wiring diagram to trace suspected faulty paths. Common issues include damaged insulation or improper wire routing. Addressing these promptly prevents further electrical system damage.
5.2 Testing the Spark Plug Connection
Use a multimeter to test the spark plug connection for continuity and proper resistance. Ensure the spark plug wire is securely connected to the CDI box. A missing or weak spark indicates a faulty connection or damaged wire. Consult the wiring diagram to verify the correct routing and connections. Spark plug issues often stem from loose wires or corrosion at the terminals.
5.3 Diagnosing the CDI Box
The CDI box is essential for generating spark in 110cc engines. To diagnose, use a multimeter to test voltage and continuity. Check connections for corrosion or damage. Consult the wiring diagram for proper testing procedures. Faulty CDI boxes often cause no-spark conditions and may require replacement. Always ensure the CDI is correctly grounded and connected to the spark plug wire for proper operation.
Safety Precautions and Guidelines
Wear protective gear and ensure the ATV is turned off. Use tools correctly and avoid shortcuts. Follow manufacturer guidelines to prevent electrical hazards and ensure safe wiring.
6.1 Proper Handling of Electrical Components
Always handle electrical components with care, ensuring the ATV is turned off and the battery disconnected. Use insulated tools to prevent shocks and avoid short circuits. Regularly clean components to maintain conductivity and prevent corrosion. Follow the wiring diagram instructions to ensure proper connections and avoid damage to the system. Safety gloves and protective eyewear are recommended when working with electrical parts.
6.2 Safety Measures for Battery Installation
When installing the battery, always disconnect the negative terminal first to prevent short circuits. Wear protective gloves and goggles to avoid acid spills or electrical shocks. Ensure the battery is securely fastened to prevent movement. Connect the positive terminal last and double-check all connections for tightness. Follow the wiring diagram instructions to ensure proper polarity and avoid damage to the electrical system.

Manufacturer Instructions and Resources
Access official manuals and wiring diagrams directly from the manufacturer’s website or trusted forums like ATVConnection. These resources provide detailed visuals and step-by-step guides for accurate installation and troubleshooting.
7.1 Accessing Official Manuals
Official manuals for 110cc engines are available on manufacturer websites or trusted forums. These documents include detailed wiring diagrams, step-by-step guides, and safety precautions. They are essential for accurate installations and troubleshooting, ensuring compliance with manufacturer specifications; Always verify the source to ensure reliability and relevance to your specific model. This ensures safe and effective repairs or installations.
7.2 Online Resources for Wiring Diagrams
Online resources like forums, manufacturer websites, and repair communities offer detailed wiring diagrams for 110cc engines. Websites such as VMC Chinese Parts and ATVConnection provide free downloads and step-by-step guides. Searching for terms like “Chinese ATV wiring diagram 110cc” yields comprehensive results. These resources are invaluable for DIY repairs and ensure accurate wiring configurations for optimal performance and safety.
Common Mistakes to Avoid
Avoid incorrect wire connections and overlooking safety protocols, as these can lead to electrical failures or safety hazards. Always follow the manufacturer’s guidelines precisely.
8;1 Incorrect Wire Connections
Incorrect wire connections are a common mistake that can lead to electrical failures or safety hazards. Ensure all wires match the diagram’s color coding and function. Misconnecting components like the ignition switch or CDI box can cause engine malfunction. Always double-check connections before powering up. Consult the wiring diagram or a professional if unsure to avoid damage or risks.
8.2 Overlooking Safety Protocols
Overlooking safety protocols can lead to electrical shocks, component damage, or even fires. Always disconnect the battery before starting work and use insulated tools. Ensure proper grounding and avoid live testing without protective gear. Follow the manufacturer’s guidelines for handling sensitive components like the CDI box or spark plug. Ignoring these steps can result in serious safety risks and system malfunctions.
A 110cc wiring diagram is an essential guide for understanding and maintaining your engine’s electrical system. By following the instructions and safety protocols, you can ensure proper connections and troubleshooting. Always use the right tools and consult manufacturer manuals for specific guidance. Proper wiring ensures optimal performance, longevity, and safety of your 110cc engine or ATV.